I’ve been getting this question more often lately, and it was also frequently asked during KreaDoe.
How do you determine the size?
There are actually different ways to approach making a frame. But one thing that’s very important before you decide anything: what are the dimensions of the fabric I’m going to use? For example, if the tufting fabric (primary tufting cloth in English) can be ordered per meter and is two meters wide (as in my shop), you might think: I’ll make my frame 1×1 meter. Then I can nicely get two canvases out of one meter. WRONG! You always need extra fabric for stretching it. So in this case, it’s better to choose a maximum of 90×90 centimeters (inside of the frame). Five centimeters of fabric left on all sides is fine for stretching.
Other possibilities include a tuft frame of 1.9×1.9m. Then you can use a cloth of 2x2m. I should mention that this is quite large. Besides not everyone having the space at home, filling such a large frame also takes an enormous amount of time. Most of my works are made on a tuft frame of 90x90cm (even the Girl with a Pearl Earring). As a final option, you could choose a rectangular frame. By using a frame of 55x90cm, you can get 3 canvases out of 2m2 and it’s also very user-friendly for people with less space at home.
Okay, so now you might know what size you want, but how do you make it? Again, there are different options for this.
Different options
Option 1: You use an existing frame such as a sawhorse. These are ready-made and available at the hardware store, and while you’re there, pick up two glue clamps as well, because you’ll need them to secure your sawhorse to the table.

Very important: If you use glue clamps to secure your tuft frame, do this on a workbench or use a small board between the clamp and the table to avoid damaging it. Unfortunately, I’ve learned this the hard way.
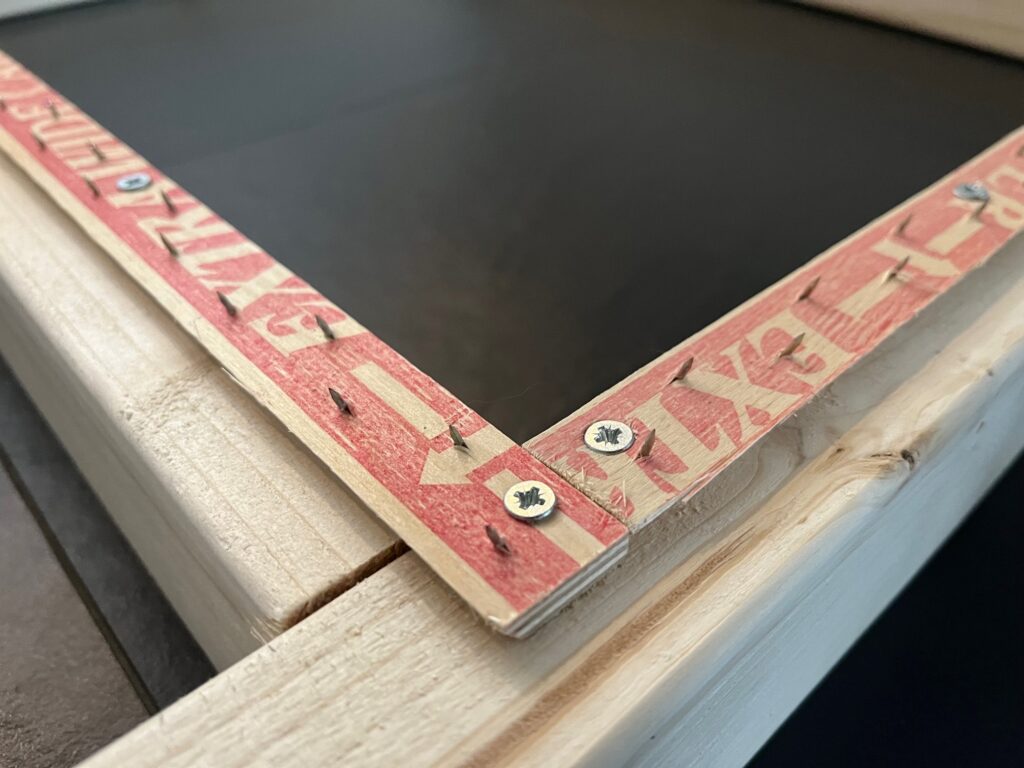
For every frame, you need tack strips or gripper strips to be able to stretch the fabric on it. For tufting, I recommend tack strips because they are stronger and there’s quite a bit of pressure on the fabric during tufting. For needle punching, I would personally choose gripper strips, as these are better for smaller frames and there’s less chance of pricking yourself like with the nails of the tack strips. Though I must say, you’ll learn to avoid that quickly enough XD. Make sure that the nails of the tack strips always point diagonally outwards, otherwise you can’t stretch the fabric properly.

Option 2: You build a table frame yourself. It’s not very difficult. At some hardware stores, they can cut the wood to the right size for you. At home, you only need to drill holes and screw the wooden boards together. Then you attach the tack strips. I also recommend screwing these on, as nails can come loose over time due to pressure. When making a table frame yourself, don’t forget that your bottom beam should be a bit longer so you can attach glue clamps to it. You can also let the top beam on the right side stick out a bit to attach an eye to it and run the thread through.

Option 3: You build a standing frame yourself. If you want a large frame or prefer not to work at a table, you can also build a standing frame. For this, the beams on the left and right side naturally need to be longer so they reach the ground. How long depends greatly on the working height you find comfortable. I find bending over very uncomfortable and prefer to stand on a stool to reach the upper part, but that can be different for everyone. Additionally, you need a few more small beams. You need to make legs and use a small beam as a crossbar for the legs (see photo) otherwise your frame will be very unstable. You also need to attach two small beams at the top between the frame and the wall. A standing frame must always lean against the wall, otherwise it will fall over when tufting.

Option 4: You create a hanging wall frame. The biggest advantage of this option is that it takes up little space in your interior. An important aspect is that you need to use wider wood to prevent hitting the wall with the tufting gun. Additionally, it’s useful to attach hinges on one side and a small magnet on the other. Of course, you need to be able to easily look at your work, and if you can open the frame, you can do so at any time. The doorknob on this frame was an idea from my father; not only does it look super cute, but it’s also convenient for easily opening and closing your frame.

If you still have questions after reading this blog, feel free to contact me through the contact form! Good luck with making your frame and enjoy many happy tufting hours 🙂