A new hobby has been added to Funky Studio’s inventory.
Actually, Shrinky dink is not a new hobby, but it has been around for a while. However, it’s now getting a fresh makeover. On social media, it’s slowly becoming a hit, and people are creating beautiful items like pins, keychains, crockpins, and earrings. Here too, the possibilities are endless, and I’m very curious to see how it will develop.
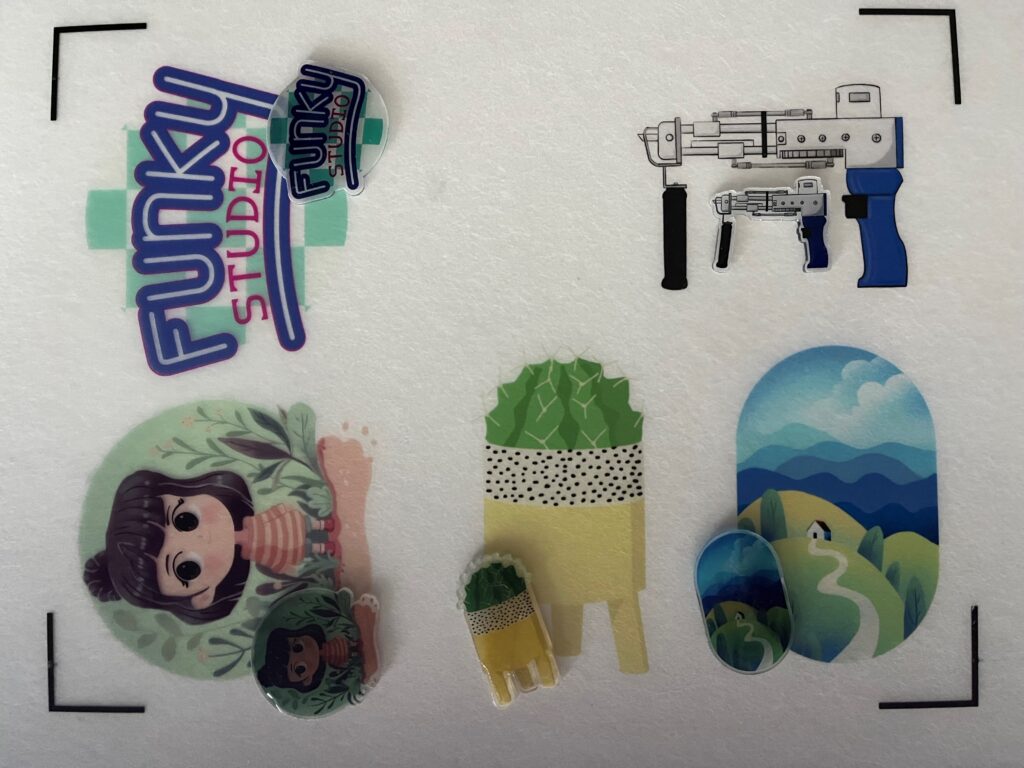
What do you need?
Getting started with shrink plastic is very easy. It doesn’t require a big investment. All you need is shrink plastic, colored pencils, scissors, and an oven. Depending on how extensively you want to pursue the hobby, you can purchase UV resin (epoxy), a printer, UV lamp, a heat gun, and even a cutting plotter. In my personal opinion, you don’t necessarily need a cutting plotter, UV lamp, printer, or heat gun for the best results. These are just things that can speed up the process. In short, the initial investment for this hobby is quite low.
How can you use it?
You can create an image on the shrink plastic by printing or drawing on it. This is done on the rough side. It works very well with colored pencils. Note: if you’re going to print, make sure to set the image very light. The image will become much darker during the shrinking process. If you want to create a nice clear edge after using colored pencils, you can do this with a permanent marker or by using a paint marker. When using transparent shrink plastic, you can also use the black marker on the smooth side.

After this, you can have the image cut out by a cutting plotter like the Cricut, but you can also simply cut it with scissors. Be careful not to cut too sharp corners. If you want to make a keychain or earrings, this is the moment to use a hole punch to make a small hole.

Next, you can start shrinking the plastic. If you use a heat gun, keep it at a sufficient distance (start with 30cm), as these always get very hot and even hotter than necessary. Additionally, make sure you don’t blow the plastic away, but place it in a pie dish or oven dish. Of course, you can also use the oven. Preheat the oven to 130 – 150 degrees Celsius. Place the shrink film on a baking sheet covered with parchment paper or aluminum foil. Leave it in the oven until it reaches its original shape again. After heating, you can flatten the plastic to maintain a neat shape.
As an additional step, you can now finish the plastic, which has become about 1/3 of its previous size and up to 9 times thicker, with UV resin. If you use this, it’s advisable to wear gloves, as contact with skin and eyes can be harmful. You can use the UV resin directly from the bottle and spread it with a cocktail stick or a small brush. After this, place the figure in the sun/outdoors or under a UV lamp. Check the packaging for recommended times.
To finish to the desired result, you can now attach keychain rings, make earrings, or use super glue to attach a pin to the back.
